Saturday, 27 March 2021

Thandai Premix Powder - HOLI SPECIAL

Thandai is a traditional Indian beverage popular in North Indian states of UP and Rajasthan and made especially for the festival of Holi. This drink is very refreshing, and a perfect summer cooler. The hindi word Thandai means coolant. 
Holi is the celebration to welcome spring officially. In India spring has more warmer tone than many other parts of the world; it feels almost like Summer. 
The body (and soul) needs something soothing to cope up with the rising temperature. As this drink has milk, nuts and various spices it helps to cool down the body temperature and that’s why it is known as Thandai.
Making Thandai is a little bit of a tedious process .So this Thandai premix powder comes in very handy when you like to sip on a chilled glass but have time crunch.
Just make a batch of this Thandai premix powder and all you need is 5 minutes to make a delicious drink.
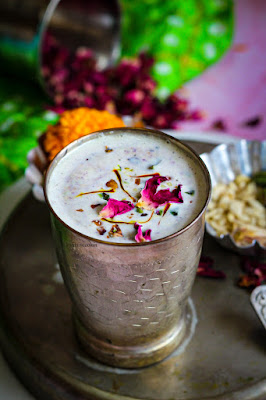
Recipe:
(Makes 3 1/2 cups powder- enough for 10-12 glasses)
Ingredients:
  • Almond - 1/2 cup
  • Pistachio - 1/4 cup
  • Melon seeds - 4 tbsp
  • Poppy seeds - 4 tbsp
  • Fennel seeds - 4 tbsp
  • Dried rose petals - 4 tbsp
  • Black peppercorn - 3 tbsp
  • Green cardamom - 3 tbsp
  • Saffron strands - 1 tsp
  • White Sugar, granulated - 1 1/2 cup
Method to make the powder:
  • First we have to smooth blend some ingredients. In a blender jar add Cardamom, Whole Peppercorns and Fennel Seeds and grind to make a fine powder.
  • Now add Almonds, Pistachio, Melon Seeds, Saffron, Dried Rose Petals, sugar and poppy seeds. 
  • Grind to make a fine powder. If you wish you can sieve and again grind the residue. Here, I didn’t sieve but its definitely a personal choice.
  • Now add the powder in a bowl and mix properly.
  • Thandai Premix Powder is ready..

Method to make Thandai from the premix:

  • Take a blending jar.
  • Now, add 2 tbsp of this Thandai premix powder and a glass of chilled milk, blend for 2 mins and allow it to be chilled. 
  • If you wish to instantly have it, add few ice cubes while blending and serve immediately. 
Notes:
Store the Thandai premix powder in a airtight glass jar and refrigerate - it lasts up to 3-4 months easily.
You can also store in room temperature, it lasts for good 2 months.

Friday, 12 February 2021

EGGLESS BLACK FOREST CAKE - VALENTINE'S SPECIAL

Who doesn't loves a classic chocolate cake? This easy eggless black forest cake recipe is made with layers of moist and fluffy chocolate sponge cake, whipped cream & luscious cherry filling. The extra piled up chocolate sprinkles and the chocolate drip are the highlight of this classic cake! 
This homemade black forest cake fits all special occasions like birthday, anniversary, or Valentine’s day. 
For me, its Valentine's special as it is basic yet classy at the same time and an absolute stunner for the day.
Happy Valentine's day to all of you, go classic this Valentine's and give this cake a try.

Recipe:
(Makes 700 gm cake)
For Cake sponge:
  • 1 1/2 cup all purpose flour/ maida
  • 3 tablespoon cocoa powder
  • 1/2 teaspoon salt
  • 1 teaspoon baking soda
  • 1 teaspoon baking powder
  • 1/2 cup sugar
  • 1 teaspoon vanilla extract
  • 1/2 cup curd/plain yogurt
  • 1/4 cup oil
  • 1/2 cup milk
  • 1 teaspoon instant coffee powder
  • 1/2 cup boiling water
For Whipped Cream:
  • 250 ml double cream/ heavy whipping cream
  • 2 tablespoon icing sugar
  • 1 teaspoon vanilla extract
For Assembling the cake:
  • 1/2 cup - Sugar syrup (From the tinned cherries or make a simple syrup with 4 tablespoon sugar and 8 tablespoon water) 
  • 1/2 cup cherries - Tinned or Fresh (For garnish)
  • 1/4 cup melted chocolate( Should not be runny, keep semi liquid so we can get beautiful drips)
  • Some chocolate sprinkles/Cherries (For garnish)
Method:
For Chocolate sponge cake :
  • Preheat oven to 180°C.
  • Grease and line a 8″ round cake tin with butter paper.
  • In a bowl mix together flour, cocoa powder, sugar, baking powder, salt and baking soda.
  • Make a well in the center of the dry ingredients and add curd, oil, milk and vanilla extract.
  • Now in half cup of boiling water add coffee powder and mix until dissolved.
  • Add the coffee water to flour and mix it to form a smooth batter.
  • Pour it into the prepared cake tin.
  • Bake for 30-40 minutes or until a tooth pick inserted comes out clean.
  • Rest it on the wire rack for 10 minutes.
  • Flip on the wire rack, remove tin and the paper.
  • Leave to cool completely before icing the cake.
For whipping the cream:
  • Add the whipping cream in a big bowl.
  • Keep this bowl in an ice bath, which means keeping it on some ice cubes. For this, take ice cubes in a big bowl. Over this keep the cream bowl.
  • Using an electric blender with a whisk attachment, start beating the cream.
  • Start with low speed and gradually move to a higher speed.
  • After 2 minutes when cream thickens a little, add powdered sugar and vanilla extract.
  • Keep whisking for 4 to 5 minutes, the cream will be ready with stiff peaks.
  • Keep it covered in refrigerator till use.
For assembling the Cake:
  • Take the cooled cake, and divide into two round equal layers.
  • Take the cake board/ dinner plate . Put little cream on it. This is done so that the cake sticks there and does not move later on.
  • Put one layer on the cake board and brush it with sugar syrup from the tinned cherries or make a simple syrup with (4 tablespoon sugar and 8 tablespoon water) using a spoon, or brush.
  • This is done to make the cake moist and also flavorful.
  • Now, add a dollop of whipped cream and spread evenly on the cake .
  • Now break few cherries (tinned or fresh) into small pieces and spread evenly on top of whipped cream.
  • Put the other layer on top and repeat by brushing with sugar syrup and adding whipped cream.
  • Cover it completely with whipped cream using a offset spatula, this is called crumb coat.
  • Don't try to get it smooth at this stage. Keep it in the refrigerator for at least 15 minutes.
  • Now take it out, again apply a coating of whipped cream and try to smoothen it .
  • Once covered with cream, pour the semi liquid chocolate on top and decorate with cream roses( i used WILTON 1M nozzle in a piping bag).
  • Add some chocolate sprinkles in the center and we are good to go.
  • You can decorate the way you like, add cherries on top as the traditional black forest cake looks or add choco chips, get creative and make with love.
  • Chill the cake for 30 mins and serve with love.

Thursday, 11 February 2021

KOTHIMBIR VADI/ CILANTRO FRITTERS

Kothimbir Vadi is yet another all time favorite tea time snack of Maharashtra. Kothimbir vadis are delicious snacks that taste excellent with a cup of piping hot tea/coffee. The deep fried delicacies are crisp on the outside and soft inside. It is a special winter delicacy because coriander is best and fresh during this season, also is available in plenty.

Recipe:
(Serves 4)
Ingredients:

  • 1 cup gram flour besan/chickpea flour
  • 2 tbsp rice flour
  • ¼ tsp turmeric powder
  • Salt to taste
  • 1/2 tsp hing/asafoetida 
  • 1 tsp Jeera/cumin seeds
  • 1 tbsp coriander powder
  • 1 tbsp white sesame seeds 
  • 1 packed cup Kothimbir/coriander leaves(washed and finely chopped)
  • 2 tbsp ginger, garlic, green chili paste
  • 1.5 cup of water
  • 2 tbsp oil for batter
  • Enough oil for deep/shallow frying kothimbir vadi
Instructions:
To make the Kothimbir Vadi batter:

  • Heat a large pan and add water, once it is boiled add oil 2 tbsp.
  • Add half quantity of sesame seeds, jeera, hing, garlic ginger chili paste, salt, turmeric powder, coriander powder and mix nicely.
  • Now add besan, rice flour and coriander leaves.
  • Mix everything nicely until well combined.
  • Switch off the flame and remove this mixture in a oil greased plate.
  • With the help of spoon or hands spread it evenly and sprinkle remaining sesame seeds on top and gently press to let them stick on vadis.
  • Once done, allow it cool at room temperature for 15-20 mins then in the refrigerator for 10 mins.
  • Now, cut squares and fry them- you can either shallow fry or deep fry.
Shallow Frying:
  • In a pan, heat 2-3 tbsp oil and add the cut vadi in a single layer without over crowding them. 
  • Fry until golden brown and flip so each side can be nice and crispy. Remove on tissue paper to absorb any excess oil.
Deep Frying:
  • In a frying pan, heat enough oil and deep fry the vadis until golden brown. Remove on tissue paper to absorb any excess oil.
  • Serve hot with your favorite chutney or ketchup.

Monday, 18 January 2021

MTR STYLE BADAM MILK POWDER

MTR KESAR BADAM POWDER is a very interesting premix. I love badam mix and have it once in a while but only chilled, my dad loves it hot. Usually I buy a pack of badam mix during winters because it is an absolute favorite of my dad, this time I made it at home.
It is a very quick and easy recipe, requires a few ingredients and very few mins to make and store.
I also found this premix as a beautiful thing to giveaway as homemade gifts for this festive season and hence made single serving very cute testubes(got them from Amazon)- which was kind off interesting and unique to give.
I made this and enjoyed it for about a month, very handy to just mix and serve.
Recipe:
(Makes 10-12 badam milk cups)
Ingredients:
TO MAKE BADAM MILK POWDER:
  • Almonds / Badam - 1 cup
  • Milk powder - 1/2 cup
  • Sugar - 2 cups
  • Saffron threads - 1 tbsp
  • Turmeric powder - 1/2 tsp
  • Cardamom powder - 1 tsp
TO BADAM MILK:
  • Hot milk - 1 cup
  • Badam mix - 2 tbsp
  • Dried rose petals - few for garnish
METHOD:
TO MAKE BADAM MILK POWDER
  • Dry roast the almonds for few minutes. Cool down completely.
  • Grind the roasted almonds, cardamom, saffron threads and turmeric powder to a smooth powder.
  • Now add the sugar and grind again.
  • Once done, take out the entire mixture in an air tight container for further use.
  • Badam milk powder mix is ready. Can store upto a month.
TO MAKE BADAM MILK:
  • To one cup of hot milk add 2 tbsp badam milk powder and mix well.
  • Garnish with a few dried rose petals.
  • Serve hot and enjoy !

Monday, 11 January 2021

HARI LAHSUN/FRESH GREEN GARLIC KA PARATHA

Hari lahsun/ fresh green garlic paratha is a staple at my home every winter season. Be it breakfast or dinner we enjoy eating this paratha with papad and curd.
The recipe is quite simple but very flavorful and the freshness of winter greens is always a delight.

Recipe:
(Makes 6 medium size parathas)
Ingredients
:
  • 1.5 cups of Whole Wheat Flour
  • 1/2 cup of fresh green garlic chopped
  • 4 green chillies fine chopped
  • 2 tbsp of oil + ghee/oil as required to cook the parathas
  • Salt as required
  • Water - enough to knead the dough
Method:
  • In a bowl, add the whole wheat flour, 2 tbsp oil, fresh green garlic chopped and salt to taste. Mix the ingredients well.
  • Slowly add water into the flour and knead the dough, soft enough to make parathas.
  • Add a tsp of oil after kneading and knead further to give good binding.
  • Divide the dough into 6 equal parts and keep aside for 20 minute to rest before rolling the parathas.
  • After 20 minutes, roll out the parathas on rolling board by dusting some flour and then cook them on a hot pan, both sides by applying ghee/oil generously.
  • Serve piping hot with some more papad, pickle and curd.

Thursday, 31 December 2020

SARSON KA SAAG WITH MAKKE KI ROTI

SARSON KA SAAG WITH MAKKE KI ROTI, the name itself has warmth in it.
Sarson Ka Saag is a popular vegetarian dish from the northern region of India. It is made from mustard greens and spices such as ginger and garlic. It is often served with makke ki roti. Sarson Ka Saag and makke ki roti with lassi, gur and kacha onion is considered a special dish in North India, especially Punjab.

I tried this entire meal for the first time and i enjoyed it as one should always cook and eat seasonal because the taste of these ingredients when they are in season is so much better than when they are not season.
In India, during winters there are a lot of seasonal dishes like Gajar halwa, Hari lasun ka paratha and this Sarson ka Saag with makke ki roti!

It is a flavorful meal and a must try one.

Recipe:
(Serves 3)

SARSON KA SAAG
Ingredients:

  • Chopped mustard leaves/ sarson - 250 gm
  • Chopped spinach leaves - 125 gram
  • Onion - 1, finely chopped
  • Tomato - 2 fine chopped
  • Ginger garlic green chilly paste - 1 teaspoon
  • Ginger - one inch piece
  • Garlic - 8 cloves, chopped
  • Green chili - 2 chopped
  • Makke ka aata/maize flour - 2 tablespoons
  • Dry red chili - 1
  • Asafoetida/ hing - 1/2 teaspoon
  • Cumin seeds - 1/2 teaspoon
  • Red chilli powder - 1 teaspoon
  • Coriander powder - 1 tablespoon
  • Haldi/Turmeric powder - 1 teaspoon
  • Salt - to taste
  • Oil - 2 tablespoons
Tadka on top:-
  • Ghee/ clarified butter - 1 tablespoon
  • Garlic - 4 cloves
  • Dry red chili - 1
  • Butter - as required for serving

MAKKE KI ROTI
Ingredients:
  • Makke Ka Atta/Maize flour – 1 cup
  • Salt to taste
  • Hot Water – enough to knead a soft dough
  • Ghee for pan frying
Instructions:

SARSON KA SAAG:
  • In a pressure cooker, add chopped leaves (sarson and spinach), salt, ginger piece, 4 cloves chopped garlic, 2 chopped green chiili. Pressure cook it for 2 whistles on a high flame.
  • On the other side, heat oil in a pan.
  • Add cumin seeds, ginger garlic green chilly paste and saute for a few seconds.
  • Then, add chopped onion and saute on a low flame until the onion turns light brown.
  • Add chopped tomato and cook it till mushy, then add all dry masala, salt and cook for a min.
  • Meanwhile, mash the cooked leafy vegetables with the help of hand beater. Then add maize flour/makki ka aata and keep mixing it till well combined- this will take a good 5-7 mins and then it will look perfect blended.
  • Now, once the oil leaves from the sides of the masala which is cooking in the other pan then add these mashed leafy vegetables.
  • Mix well and cook on a low flame for 5 mins covered.
  • Once you see it is starting to stick at the base of the pan, sarson ki sabji is done- switch off the flame.
  • Meanwhile, prepare the tadka. 
  • Heat ghee in a pan. Add 4 cloves garlic chopped, hing and dried red chili. Saute for a few seconds till garlic is light brown in color.
  • Take a serving bowl and add sarson ka saag. Pour the tadka on it and a dollop of butter.
  • Delicious 'Sarso Ka Saag' is ready to be served.
MAKKE KI ROTI:
  • Take makke ka aata in a large bowl and add in hot Water, 1 tbsp at a time.
  • Knead to make a dough, use the palm of your hand to knead nicely so you are able to make a soft ball.
  • Take a small sheet of silver foil/ziploc bag and cut it open.
  • Place it on your rolling surface.
  • Wet the plastic bag with water.
  • Place a small dough ball and add a few more drops of water on top.
  • With the help of rolling pin start rolling very softly as it tends to break or can even press the same with fingers and make like a small palm size roti.
  • Carefully remove from the plastic and place on a hot tawa/ frying pan.
  • Allow it to cook on the bottom.
  • After a couple of minutes, put a few drops of ghee on top and flip.
  • Cook the other side as well and take it off the flame.
  • Repeat the same with other rotis and serve hot!
Notes:
  • For the makke ki roti, i personally like cooking a little on direct flame too, so once it is semi cooked both sides i cook on flame for that charcoal effect and then after taking it on a plate apply ghee on top.
  • While hand mashing the leafy vegetables do not use an electric beater it will make them into a puree and wont taste good, try mashing nicely with hand beater- i used the authenic wooden hand beater. 
  • Mashing the leafy vegetables is important do not skip it.
  • Adding makke ka aata in the saag gives a rice thick texture but can be replaced with besan too.

Thursday, 10 December 2020

HOMEMADE HOT CHOCOLATE PREMIX - CHRISTMAS SPECIAL

This homemade hot chocolate mix takes five minutes to prep, is easy to store, and makes a super-rich and decadent cup of hot chocolate. And hot chocolate is a really warm and cozy drink to have in this cold weather. It’s easy to gift and simple enough to make!
I made super cute single serving packs and used GLASS TEST TUBES with cork to give as gifts.
Honestly , was a complete hit for my holiday gifting. 

Recipe:
(Serves 8)
Ingredients:
  • 3/4 cup Powdered Sugar
  • 1 tsp vanilla extract
  • 2/3 cup Cocoa Powder
  • 4 oz Bar Bittersweet Chocolate, grated
  • 1/2 tsp Instant coffee Powder
  • 1/2 tsp Cornflour
  • 1/2 tsp Salt
Method:
  • Place the grated chocolate, salt , coffee powder in a large bowl and sift the cocoa powder, powdered sugar and cornflour over the chocolate.
  • Give everything a good mix in a mixer grinder for hardly a minute along with vanilla extract and place the ready mix in a jar with a tight fitting lid.
  • When you wish to make yourself a cup, simply add 1 cup of milk to a small saucepan and bring to a simmer, add 2 and a half heaping tablespoons of the hot chocolate mix to the simmering milk and cook for 1 minute making sure to stir the whole time.
  • Pour into a mug, top with mini marshmallows and enjoy!

MATAR PANEER

Matar Paneer is a favorite of every vegetarian and so is mine. This recipe is quite a basic and simple one but still tastes amazing. Also, this is quite a quick recipe cooked in a pressure cooker and hardly requires several ingredients or too much time.
Food for the soul it is when served with steaming hot chapatis and of course legendary Sindhi PAPAD.

Recipe:
(Serves 3)
Ingredients:
  • 1/2 cup Green Peas/ Matar
  • 3 Tomatoes, pureed
  • 150 gm Paneer/ Cottage cheese cubed
  • 1 tsp cumin seeds
  • 3 Green chilies small cut
  • Few curry leaves
  • 1 tsp Turmeric Powder
  • 1 tbsp Red Chili powder
  • 1 tbsp Coriander powder
  • 2 tbsp Vegetable oil
  • Salt to taste
  • Fresh chopped coriander for garnish
Method:
  • Heat oil in a pressure cooker and add cumin seeds - let it change color.
  • Now add the tomatoes and green peas along with all the dry spices.
  • Add green chili, curry leaves and cook for 5 minutes till you see that  the gravy stick to the base and water is almost dried up.
  • Add some water and pressure cook for 3 whistle till the peas are nice and soft .
  • Once done, open the lid of the pressure cooker and add the cubed paneer pieces and just add steam into pressure cooker - make sure not to let it whistle as the paneer gets chewy when cooked much.
  • Garnish with freshly chopped coriander and serve with hot Roti or Steamed rice.
Notes:
The gravy of this dish is neither thick nor too watery, so try to balance with the water.
You can also fry the paneer pieces and then add into the gravy, and then just let it cook for a min in the gravy - no need to steam the vegetable.

Friday, 27 November 2020

ALOO TIKKI CHAAT

Street style chaat is everyone's favorite. Here is the most common chaat found mostly in north india , ALOO TIKKI CHAAT . A great appetizer and definately loved by all . When you have all the elements ready , it takes 5 mins to assemble and serve . My family loves and devours it and i personally am a fan of it. Aloo tikki if made at home , this aloo tikki chaat is a must then . 

Recipe:
(Serves 2)
Ingredients:

  • 4 aloo tikkis
  • 2 tbsp Green chutney
  • 2 tbsp sweet curd/yogurt ( 1 tbsp sugar and 2 tbsp curd whisked together)
  • 2 tbsp fine chopped onion
  • Chaat masala to sprinkle on top
  • Jeera powder to sprinkle on top
  • Sev to sprinkle on top

Method:
  • Take 2 individual serving bowls .
  • Break 2 tikkis is each bowl .
  • Put green chutney and sweet curd on top .
  • Sprinkle chaat masala , onion and jeera powder on top .
  • Top it with sev and serve immediately.
Notes:


I like my curd sweet as then i do not need sweet chutney additional , if you have sweet chutney available then no need to add sugar to the curd .

RAW - BEETROOT AND CARROT TIKKI/CUTLET

Tikkis are a weakness in my family , and so i keep trying different recipes .
This recipe is a healthy one, which has veggies and no potatoes and even the veggies are raw and not cooked.  My sister is very fussy when trying something new , but i am glad she enjoys these tikkis like the regular ones.
This is quite easy yet super delicious and the best part its a one bowl recipe and totally wins the heart of everyone.

Recipe:
(Makes 8 medium tikki)
Ingredients:
  • 1/2 cup raw beetroot small chopped
  • 1/2 cup raw carrot small chopped
  • 2-3 green chili
  • 6-7 garlic cloves
  • 1 tsp garam masala powder
  • 1/2 cup bread crumbs
  • Salt to taste
  • 1 tsp khuskhus/ poppy seeds
Method:
  • Take a chopper , add carrot , beetroot , chillies and garlic .
  • Chop the entire mixture very fine .
  • Take it out in a mixing bowl , add bread crumbs , garam masala , khuskhus and salt.
  • Mix well and form tikkis / cutlets into desired shape - i made small circle shaped.
  • Now take a frying pan and shallow fry the tikki on medium to high flame - once it is crispy on both sides take it out on a serving plate.
  • Ready to serve with your favorite coriander mint chutney.
Notes:
This recipe requires garlic more than usual , as the taste enhances with it.
Once the tikki are shaped , these can be stored in the refrigerator for 2 days in a air tight container - just shallow fry whenever required.

POTATO BREAD ROLLS

Potato bread rolls is a snack that i grew up eating all the time. It was a go to snack my mom made, for almost all family gatherings. It is easy and tasty and filing and so is loved by all.
We sindhis have a tendency of eating potato too much, and hence this snack is a childhood favorite of mine.
Simple mashed potatoes with a few seasonings and then deep fried, this is just irresistible.

Recipe:
(Makes 8 potato rolls)
Ingredients:
  • 8 White bread slices
  • 3 Potatoes medium size, boiled and mashed
  • 1 Onion small size, finely chopped
  • 1 tsp Cumin seeds
  • 1/2 tsp Mustard seeds
  • 2-3 Green chillies finely chopped
  • 3 tbsp Coriander leaves finely chopped
  • ½ tsp Garam masala powder
  • 1 tsp Amchur powder
  • 1 tsp Red chili powder
  • Salt to taste
  • 1 tbsp Oil
  • Oil - for deep Frying
  • Water - for dipping the bread 

Method:
To make the roll stuffing:
  • Firstly, heat 1 tablespoon oil in a pan.
  • While the oil is heating, add cumin and mustard seeds and allow it to crackle.
  • Then, add chopped green chillies and fry for another few seconds
  • After that add chopped onions and fry until soft and pink.
  • Now on low flame, add boiled and mashed potatoes. Along with potatoes, add corinader leaves,garam masala powder, amchur , salt and red chili powder.
  • Combine everything together very well to form the stuffing of the bread roll and witch off the flame. Then, keep the stuffing aside to cool a bit and make 8 lemon sized balls to stuff in the bread.
To make bread roll:
  • Firstly , trim all the 4 sides of the bread a little .
  • In a bowl , add a cup of drinking water to dip the bread slices.
  • Now, take one bread slice and dip it in water for just a second.
  • Then squeeze it well flat between the palms and place the stuffing mixture ball in the center.
  • Carefully, bring the edges together along with hands and squeeze it to seal the stuffing within.
  • You will see  that it will start coming together , shape into long logs and potato bread roll is ready.
  • Now, repeat the same for all the slices.
  • Once done, keep all the rolls in the refrigerator for 10 mins.
To fry the bread rolls:
  • As all the rolls are resting in the refrigerator, then heat enough oil in kadhai or deep pan.
  • Now , take out the rolls from refrigerator and they are ready to fry.
  • Gently, slide in the rolls and fry them until golden and crisp. Repeat the same for all the rolls.
  • Once done crisp and tasty stuffed bread rolls are ready to serve with chutney or ketchup.

KADA PRASAD - GURUNANAK JAYANTI SPECIAL

Kada Prasad is sweet flour based oily vegetarian food that is offered to all visitors to the Darbar Sahib in a Gurdwara. This is regarded as food blessed by the Guru and should not be refused. All devotees who visit Gurudwara on Guruparab and special days, will be offered kada prasad.
The key to a good halwa is to cook the whole wheat flour on a slow flame and get a brown colour with a sandy/grainy texture. The authentic kada prasad which is offered in the gurudwara is just 4 ingredients, no elaichi powder no nuts yet the most delightful and soulful it is. It is served with hands and also taken with both hands very respectfully, this is the simplicity and the way it is offered.


Recipe:
(Serves 4)
Ingredients:
  • Ghee (clarified butter) - 1 cup
  • Atta (whole wheat flour) - 1 cup
  • Sugar - 1 cup
  • Water - 2.5 cups
Method:
  • In a pan heat the ghee and add atta. 
  • Cook on a slow flame till the color gradually changes into a golden brown. 
  • At this stage add water and sugar and on slow flame cook till it absorbs all the water. 
  • Cook for some more time till the ghee ooze out of the sides of the halwa.
  • Now, cover the pan and cook covered for 5-7 mins.
  • Once done, you will see the ghee will be on the top .
  • Mix nicely and switch off the flame .
  • The authentic GURUDWARA KADA PRASAD is ready ,serve hot.

Saturday, 14 November 2020

RASMALAI CAKE ( Saffron and cardamom flavored cake)

Rasmalai cake , yes it is quite trending and so i had to try it too. This is a unique combination yet a completely amazing twist to the regular rasmalai. A perfect festive cake, and no other festival than DIWALI  was perfect for this.
I used simple vanilla sponge with a hint of cardamom and its infused with cardamom  and saffron flavors , so delicious you will definitely get compliments . Though am an amateur in baking but i really loved decorating the cake and was happy with the final outcome.

Recipe :
(Makes 750 gm cake)
Ingredients:

For Vanilla Cake :
  • All Purpose Flour-1 1/3 cups
  • Granulated Sugar-3/4 cup
  • Baking Powder-1/2 tsp
  • Baking Soda-1 tsp
  • Salt-a pinch
  • Milk-3/4 cup
  • Curd/ Yoghurt-1/2 cup
  • Oil-1/2 cup
  • 1 tsp cardamom powder
  • Vanilla Essence-1 tsp
For Whipped cream :
  • 2 cups heavy whipped cream ( i used TROPOLITE brand)
  • 5 tbsp powdered sugar 
  • 2 tbsp RAS from rasmalai
  • 1 tsp kesar milk ( 10-12 strands in warm milk)
For assembling the cake :

Method:
For Vanilla sponge cake :
  • Preheat oven to 180°C.
  • Grease and line a 7″ round cake tin.
  • In a bowl mix together flour, sugar, baking powder, salt and baking soda.
  • Add the curd, oil, milk , cardamom powder and vanilla in the centre.
  • Mix it to form a smooth batter.
  • Pour it into the prepared cake tin.
  • Bake for 30-40 minutes or until a tooth pick inserted comes out clean.
  • Rest it on the wire rack for 10 minutes.
  • Flip on the wire rack, remove tin and the paper.
  • Leave to cool completely before icing the cake.
For whipping the cream:
  • Put whipping cream in a big bowl.
  • Keep this bowl in an ice bath, which means keeping it on some ice cubes. For this, take ice cubes in a big bowl. Over this keep the cream bowl.
  • Using an electric blender with a whisk attachment, start beating the cream.
  • Start with low speed and gradually move to a higher speed.
  • After 2 minutes, when cream thickens a little, add powdered sugar, kesar milk and RAS.
  • After 4 to 5 minutes, the cream will be ready with stiff peaks.
  • Keep it covered in refrigerator till use.
For assembling the Cake:
  • Take the cooled cake, and divide into two round equal layers.
  • Take the cake board/ dinner plate . Put little cream on it. This is done so that the cake sticks there and does not move later on.
  • Put one layer on the cake board and  brush it with ras from the rasmalai, using a spoon, or brush . This is done to make the cake moist. Milk seeps in making the cake moist and also flavorful.
  • Usually, we use sugar syrup but since this is a special cake we are using sweetened milk ( RAS).
  • Now, add a dollop of whipped cream and spread evenly on the cake .
  • Now break 3 rasmalai into small pieces and spread evenly on top of whipped cream , also a few chopped pistachios and rose petals.
  • Put the other layer on top and repeat by brushing with RAS and adding whipped cream .
  • Cover it completely with whipped cream using a spatula , this is called crumb coat.
  • Don't try to get it smooth at this stage. Keep it in the refrigerator for at least 15 minutes.
  • Now take it out, again apply a coating of whipped cream and try to smoothen it .
  • Once covered with cream, decorate with cream roses( i used WILTON 1M nozzle in a piping bag), pistachio,dried rose petals and a piece of rasmalai in the center.
  • You can decorate the way you like, get creative and make with love.
  • Chill the cake for 30 mins and serve with love.
Notes:
You can use almond essence in the whipped cream it tastes delicious.

Saturday, 7 November 2020

SUGAR FREE AATA LADOO (Wheat flour and jaggery balls)

Atta ladoo are quick to prepare and these are healthier then the usual ones as sugar is replaced with Jaggery.
Jaggery is a good substitute to refined sugar and whenever possible I try to replace sugar with jaggery. Also, my family loves the flavor of jaggery. These are basically 3 ingredients - atta , ghee and jaggery , but trust me the most amazing and guilt free sweet you can snack on for your craving post every meal as we say "KUCH MEETHA CHAHIYE ".

Recipe:
(Makes 8 lemon sized ladoo)
Ingredients:
  • 1/2 cup aata (Wheat flour )
  • 1/2 cup jaggery powder
  • 1/4 cup ghee (clarified butter ) plus 1 tbsp
  • 1 tbsp chopped almonds
  • 1/2 tsp cardamom powder
  • 1 tsp white til/ sesame seeds
  • 1 tsp khuskhus / poppy seeds.
Method:
  • Take a Pan or Kadhai and add 1/4 cup ghee , add chopped almonds and roast for a min and take them out on a plate.
  • Now add atta in the same leftover ghee and keep roasting it nicely on medium flame (approx for 8-10 good minutes) till the time atta turns into good golden color.
  • Once done switch off the flame and let the mixture cool for a 5-7 mins.
  • Add jaggery powder of same quantity as you have taken atta along with roasted almonds , cardamom powder , khuskhus and white til.
  • Mix well for 2min till you see that jaggery is completely combined with atta .
  • Let it cool , but dont allow it to cool down completely and start shaping it into lemon sized balls, apply a little amount of ghee onto your palms as it helps binding the mixture with hands.
  • The mixture will be still warm , be careful not to press too tight while making balls, also if you feel it is difficult to bind the ladoos - add a tbsp of ghee and shape it. 
  • Make all the ladoo and store them in a airtight container , they stay fresh for 4-5 days .

KESAR RASMALAI

Rasmalai, a dessert originating from the land of the Royal Bengal is worthy of being served to Royalty!
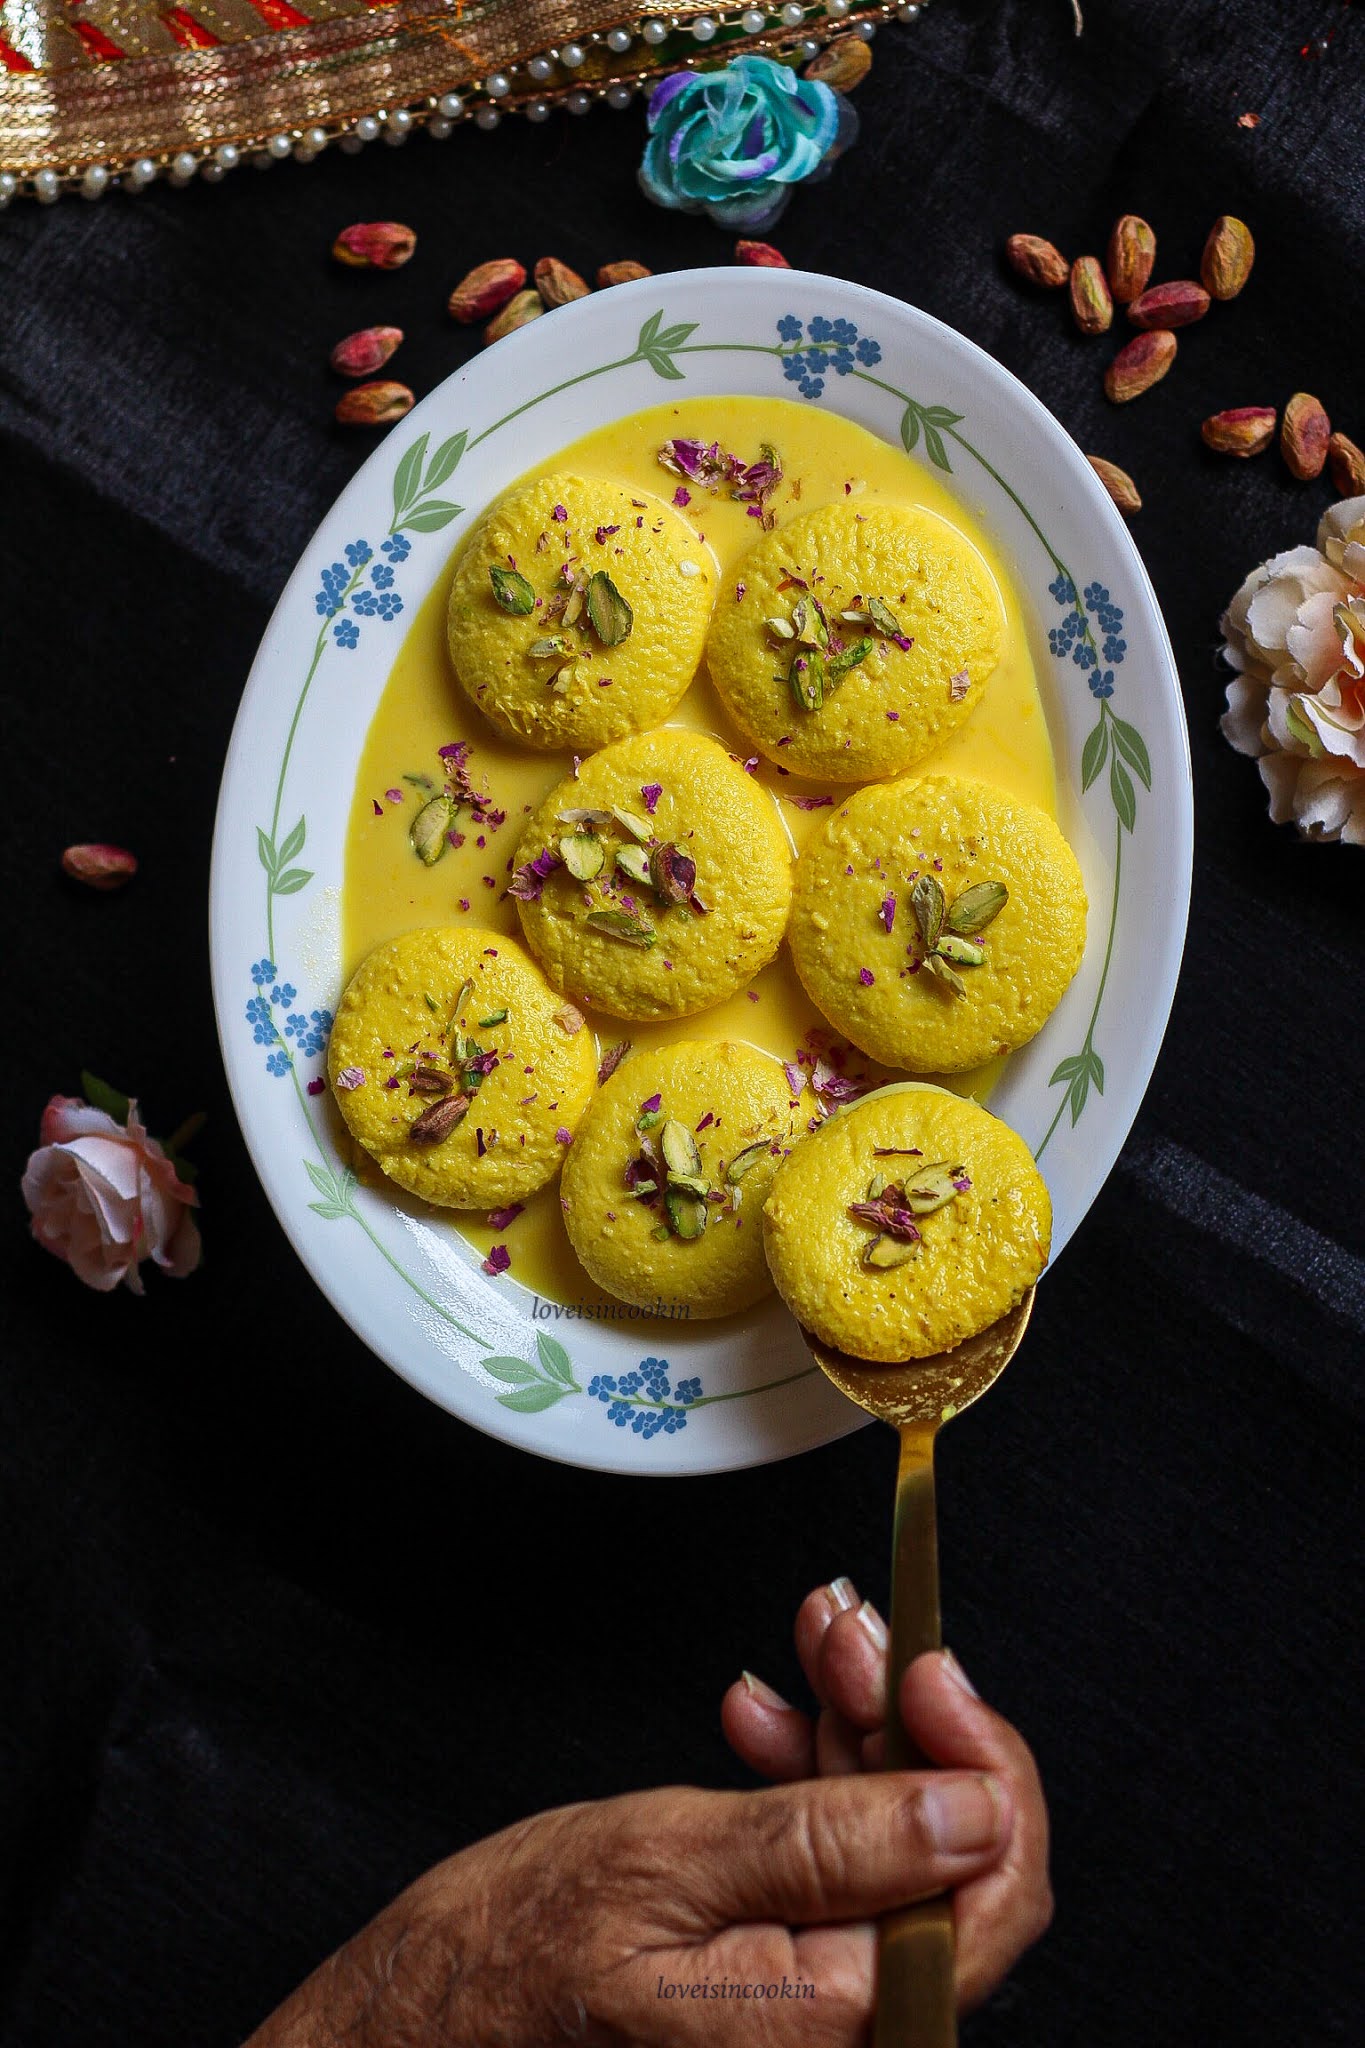
Rasmalai is quick to make when your homemade rasgullas are ready. Rasmalai is a rich indian delicacy, rasgullas soaked in thickened milk with the slight flavour of sugar syrup and saffron topped with nuts. This Indian dairy delight is a luscious treat with an incredible melt-in-your-mouth texture that will only leave you craving for more, also my personal favorite.

RECIPE:
(Serves 4)
INGREDIENTS:
For Chenna / Paneer ( To make Rasgulla balls ):
  • 1 litre milk ( I used Amul )
  • 2 tbsp lemon juice
  • 1 cup water
For sugar syrup:
  • 2 cups sugar
  • 6 cups water
For Ras ( THICKENED MILK ):
  • 1 litre milk ( I used Amul Gold )
  • ¼ cup sugar
  • ½ tsp cardamom powder
  • 2 tbsp saffron milk (15-20 strands of saffron soaked in 2 tbsp milk )
  • Few pistachios fine chopped
  • Few almonds fine chopped 
  • Few cashews fine chopped
For garnish :
  • Few pistachios chopped 
  • Few dried rose petals 
METHOD:
For Ras ( THICKENED MILK ):
  • Take a thick bottomed pan and heat milk - it should get to a boil.
  • Once a layer of cream is formed over the milk, stick it to sides of vessel.
  • Repeat the process for at least 5 times or till milk reduces to half.
  • Now add sugar, cardamom powder and saffron milk and give a good mix.
  • Scrape off the collected cream from sides and give a good stir ( i usually do this with a whisk so that all the cream is well combined and makes the milk thick).
  • Take out the thickened milk in a large bowl , let it come to room temperature then refrigerate this Ras for an hour.
For Chenna / Paneer ( To make Rasgulla balls ):
  • Firstly, boil milk and add lemon juice and stir till milk curdles completely.
  • Drain the curdled milk and squeeze off excess water and add a cup of drinking water and again drain the excess water.
  • Keep aside for 30 mins , now after 30 minutes start to knead the paneer for 10 minutes.
  • Use your palm and knead nicely .
  • Once done make small balls lemon sized and flatten them .
  • Keep these balls aside.
For sugar syrup:
  • Firstly, take sugar and water in a vessel and boil this syrup for 10 minutes.
  • After that, drop the prepared paneer balls one by one slowly , cover and boil for 15 minutes.
  • Once done keep it covered for 10 mins , here at this step our homemade RASGULLA is ready .
  • Take the Rasgulla and gently squeeze of sugar syrup(not completely or they will break ).
  • Now , dip these rasgullas in the thickened milk which is chilling in the fridge to make rasmalai and let them soak for 15-20 mins in the refrigerator itself.
For assembling the RASMALAI :
  • Take a deep plate or dish , pour the chilled Rasgulla balls soaking in the RAS for 15-20 mins.
  • Garnish with few chopped pistachios and rose petals .
  • RASMALAI is ready to serve.


Notes:
The chilling period depends upon the taste - my family doesn't prefer it to be extremely chilled , so i serve it cold.
The shelf life is 3-4 days , it stays fresh once refrigerated.

SINGAR JI MITHAI (Sindhi SEV barfi ) - DIWALI SPECIAL

I am a fan of indian sweets , and to be precise typical sindhi mithai . 
Sev ki barfi or singar ji mithai is one of the most loved Sindhi recipes. It is a traditional sweet which is quite easy to make. You also make it from the most unlikely savory ingredient Sev . This recipe is a family favorite. 
This recipe requires only 4 major ingredients that is milk , mawa , sugar and sev. A very delicious yet simple preparation.
We have grown up eating this sweet. My mom taught me this beautiful delicacy and i am proud to be making it the way her mithai turned out. Making this a wonderful trip down memory lane, as every DIWALI this is a mandatory sweet preparation .

Recipe :
(Makes 1.5 kg mithai )
Ingredients:
  • 1 & 1/2 cup unsalted sev
  • 1 cup Mawa/khoya
  • 1 cup Sugar
  • 1 cup Milk + Water (50 :50 ratio)
  • 1/4 tsp cardamom powder
  • 8-10 pistachios Chopped
  • 5-6 almond Chopped
  • 1 tsp rose essence
  • 1 tbsp kesar/ saffron strands
  • 2 tsp Ghee
  • Few dried rose petals
Method:
  • Heat a big pan , add milk+water mix,  boil for 5 min on low flame
  • Then add sugar , rose essence , cardamom powder and cook for 2-3 min on medium flame
  • Then add mawa and stir it for 2-3 min on medium flame.
  • Then add kesar and unsalted sev .
  • Mix it well on low flame cook for 2-3 min but do not mix vigorously as the sev will break .
  • In the end add 1 and half tsp of ghee then mix it very gently and switch off the flame.
  • Now cover it and keep aside for 15 min in the same pan.
  • Then take a plate/cake tin , grease with 1/2 tsp ghee and take out all the sev mithai on the plate.
  • Set properly all over the plate then spread chopped almond and pistachios and rose petals.
  • Let it cool for 2-3 hours and then cut into small squares and serve.
Notes:

The texture of this mithai is usually soft and moist , it will not be dry - so carefully take out the pieces from the plate once it is nicely cool and set.
Store it in an air tight container - stays fresh for 3 -4 days .

Monday, 19 October 2020

KACHALU / ARBI TUK

In the Sindhi Cuisine there is a popular preparation of crispy double fried potato slices known as Aloo Tuk. This is similar to that but made with arbi which is known as Kachalu in Sindhi language. They are known as Colocasia or Taro root in English. There are two ways of making this. You can either boil the kachalu and them press them flat and fry to a crispy texture or you double fry them, i.e. First half fry the kachalus and then you press them again to fry for the second time. I always prefer the second option as that is actually the traditional way of frying the Tuk . These make a perfect accompaniment with dal chawal / Sindhi kadhi  ( http://loveisincookin.blogspot.com/2020/07/sindhi-kadhi.html )/ sai bhaji pulao .
It is basically a side dish that sindhi people love eating .

Recipe:
(Serves 3-4)
Ingredients:
  • 250 gms Arbi/Kachalu
  • Oil for deep frying
  • 1 tsp turmeric powder
  • 2 tbsp coriander powder
  • 1 tbsp red chilly powder
  • 1 tsp amchur or dried mango powder
  • Salt to taste
  • Fresh coriander leaves for garnish
Method:
  • Wash and pressure cook Arbi / Kachalu for two whistle.
  • Let it cool and then peel it completely.
  • Heat oil in a pan and half fry them .i.e. put the full kachalu in the oil and fry till there is a coating , do not brown them .
  • Remove kachalu from pan and let them cool down for 5 mins.
  • Now gently flatten them with palm ( i use a tissue or a clean kitchen towel and flatten them between it), be careful as it tends to break.
  • Slide the flattened kachalu in the hot oil and deep fry until golden brown and crisp - this is the double frying step which is called tuk.
  • Once done , remove them in a bowl .
  • In the same pan , remove all the oil and just keep a tbsp of oil , mix all the dry spices and sprinkle them over kachalu and put in pan and just roast for a min or two so that the spices are well roasted.
  • Garnish with fresh chopped coriander leaves and ready to serve.
Notes:
Kachalu tends to get mushy quickly , so be careful while pressure cooking it.